The store will not work correctly when cookies are disabled.
We collect user information to provide a better user experience and protect the security of our website. By continuing to use our website, you acknowledge the use of cookies.
Drop your email below and we'll be first to let you know.
$67.14
Quick Overview
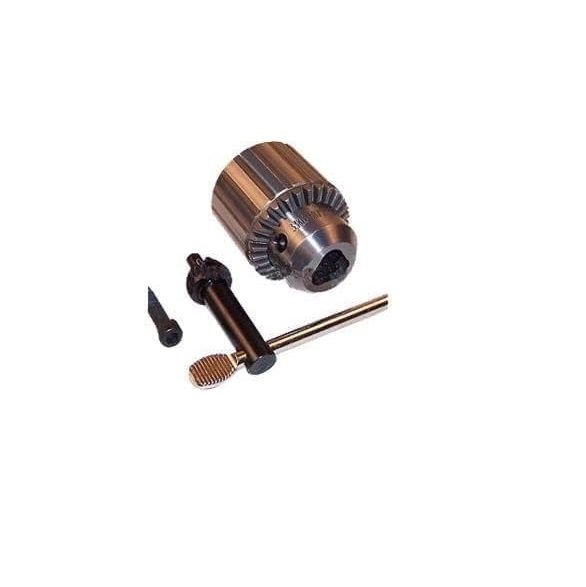
The Milwaukee 48-66-1481 Keyed Electric Drill Chuck is a part that is used to grip the drill bits. It has a key-way design that enhances its holding power to prevent the bit from slipping during high torque operations. To use, insert the desired bit, then tighten the jaws with the chuck key provided. This is used in accurate drilling and also reduces the damage to the bit and the chuck. Advantages include better grip on the bits, sturdiness due to tough material for demanding tasks, and suitability in use with most drills.
What maintenance is required for the Milwaukee 48-66-1481 Chuck?
Regularly inspect the drill chuck for worn jaws, rust, or debris that can reduce gripping performance. Clean the interior and exterior with a brush and lightly lubricate moving parts to ensure smooth operation. Check for proper tightening to prevent slipping. Replace any damaged jaws or components to maintain safe drilling accuracy.
What are common issues with the Milwaukee 48-66-1481 Chuck?
Bit slipping during operation.
Chuck not tightening fully.
Drill torque not transferring evenly.
Difficulty inserting or removing bits.
Please, mind that only logged in users can submit questions
We strive to provide our customers with a hassle-free and efficient shopping experience. Our shipping policy ensures the timely delivery of your orders and complete customer satisfaction. View More
We are committed to ensuring your complete satisfaction with every purchase. We understand that circumstances may arise where you must return a product or request a refund. If for any reason you are not satisfied, you may return the item(s) according to the terms outlined below. View More
This Payment Policy outlines the terms and conditions governing all payments made for products purchased through our website. By making a purchase, you agree to be bound by this Payment Policy. View More
Installation Steps
Step1: Unplug the drill or remove the battery to prevent accidental startup.
Step2: Loosen and remove the old chuck by turning it counterclockwise or using the chuck key.
Step3: Clean the spindle threads to remove debris or rust.
Step4: Thread the new drill chuck onto the spindle carefully.
Step5: Tighten securely by hand and, if applicable, use the chuck key for final adjustment.
Step6: Reconnect power and test the chuck for proper grip and rotation before use.

Validate your login